Add RPCh to your EVM wallet on any EVM chain
To start using RPCh, you’ll need to set it up as your RPC provider in your wallet. Now that you have your unique Docker command running you can add your RPCh network to your wallet either through the dashboard or manually.
By adding it manually you can choose to run it on any EVM chain of your choice. Whereas the dashboard will default to setting up RPCh for Gnosis chain.
Adding RPCh Using the Dashboard
(1) Navigate back to the dashboard where you found your unique Docker command. If you closed your browser you may have to log in again.
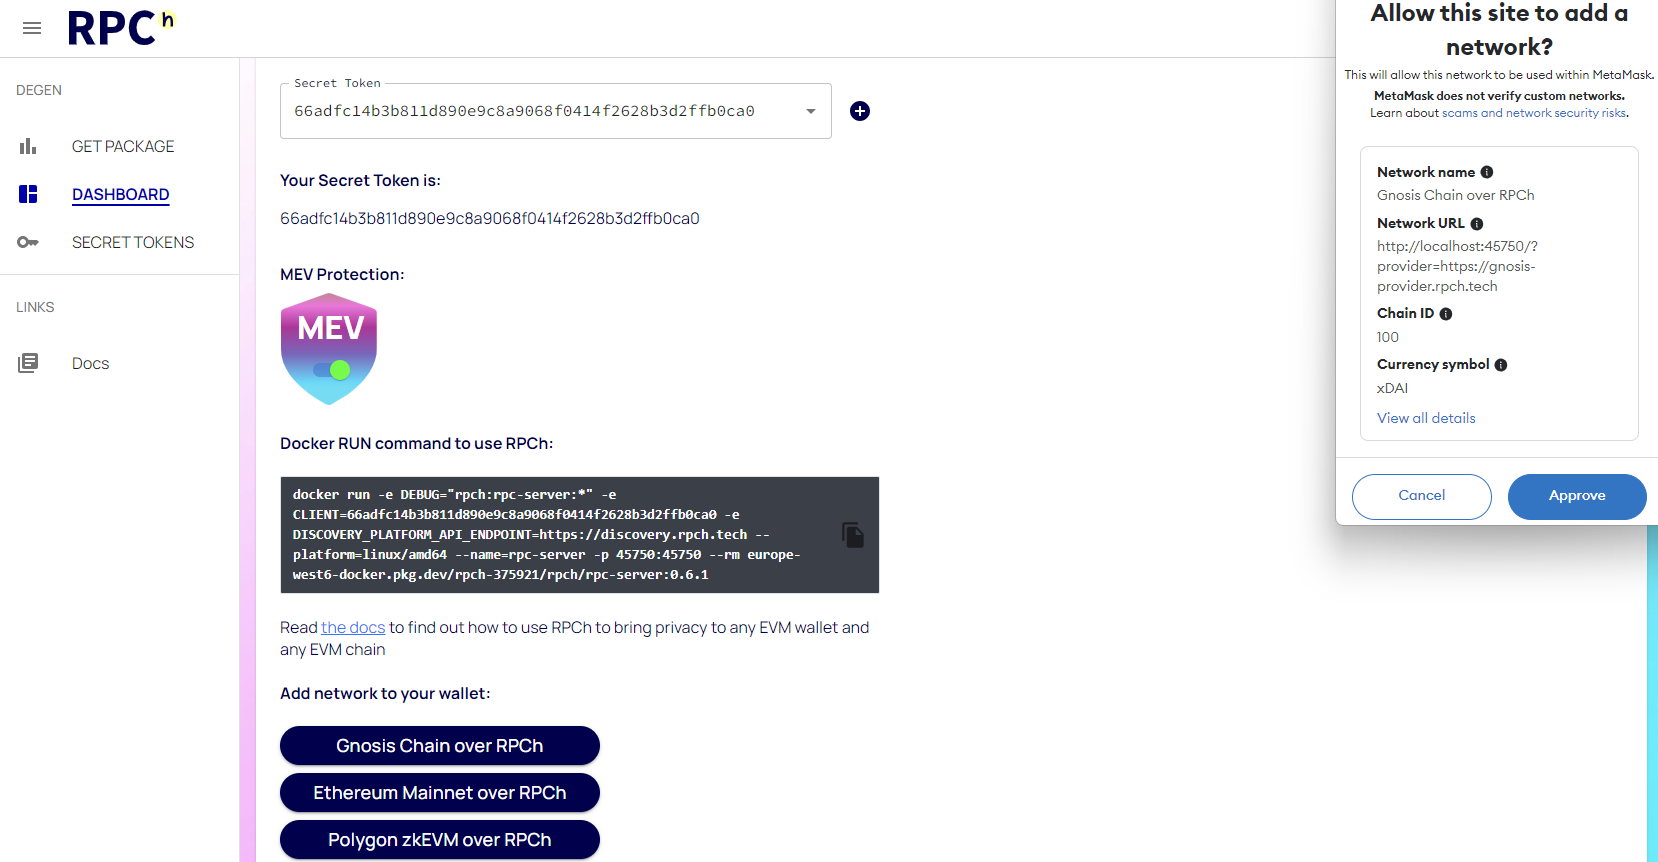
(2) Then, Press either the button titled Gnosis Chain Over RPCh, Ethereum Mainnet Over RPCh or Polygon zkEVM Over RPCh depending on what chain you want to use.
(3) Finally, approve your wallet's request when prompted.
That's all! You should now have a new RPCh Network you can use to privately interact with web3.
Adding the RPCh Network Manually (RPCh Endpoints)
Adding your network manually also allows the added beneifit of choosing your own desired RPC provider These instructions are for MetaMask, but RPCh will work for any wallet that allows you to manage RPC endpoints.
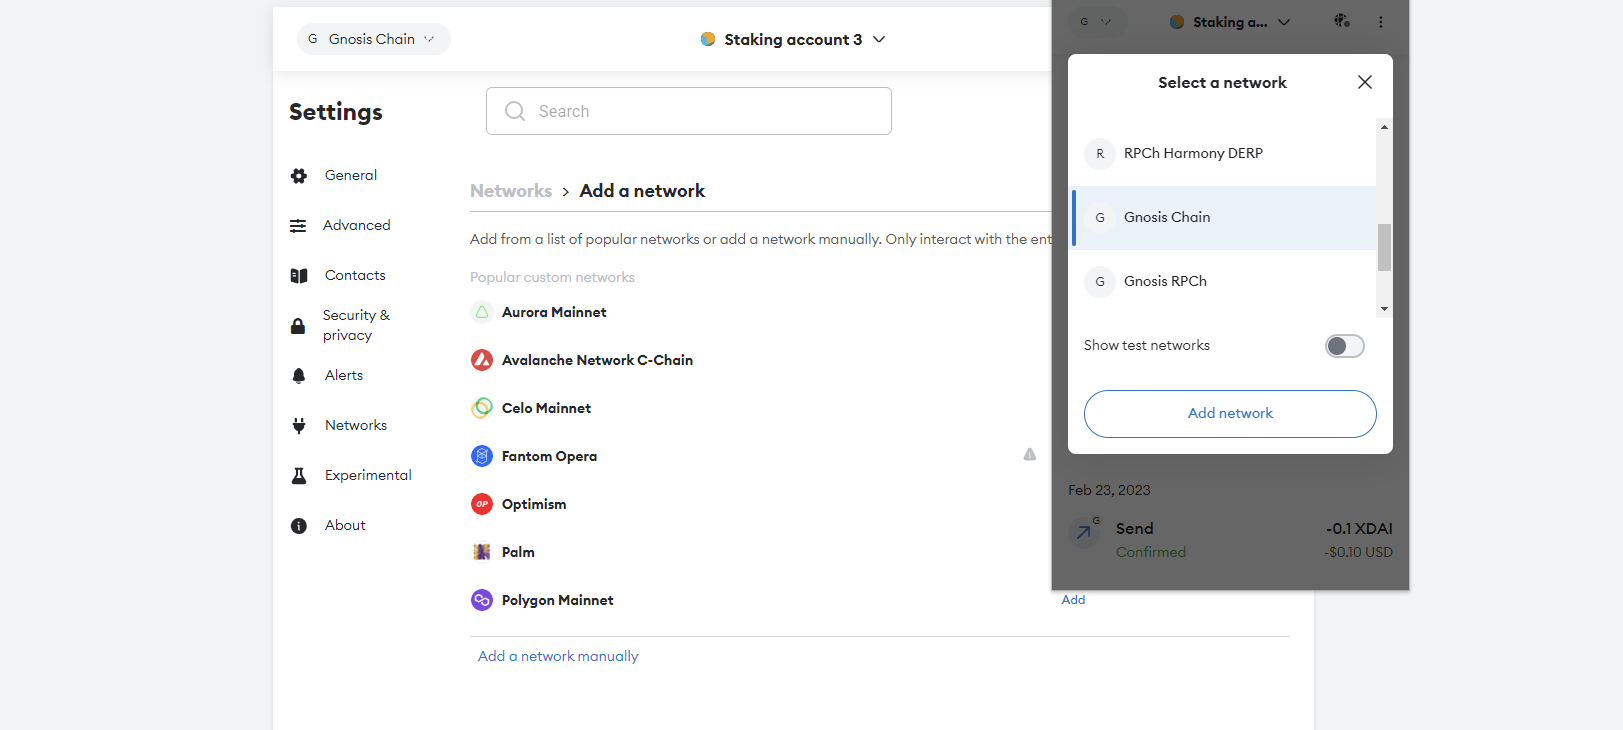
(1) Click on the Networks icon in the top left of the wallet and then press the Add Network button.
(2) Click on the Networks tab on the left and in the field that appears add the following information depending on your chain:
- Ethereum
- Gnosis Chain
- Polygon zkEVM
- Network Name:
RPCh - Mainnet - New RPC Url:
http://localhost:45750/?provider=https://ethereum-provider.rpch.tech - Chain ID:
1 - Currency Symbol:
ETH
- Network Name:
RPCh - Gnosis Chain - New RPC Url:
http://localhost:45750/?provider=https://primary.gnosis-chain.rpc.hoprtech.net - Chain ID:
100 - Currency Symbol:
xDAI
- Network Name:
RPCh - Polygon zkEVM - New RPC Url:
http://localhost:45750/?provider=https://polygon-provider.rpch.tech - Chain ID:
1101 - Currency Symbol:
MATIC
Note: If you are using a VPS to run RPCh, replace localhost with your VPS IP address for your RPC URL, for example: http://142.93.5.175:45750/?provider=https://primary.gnosis-chain.rpc.hoprtech.net would be my RPC URL if my VPS had the IP address: 142.93.5.175.
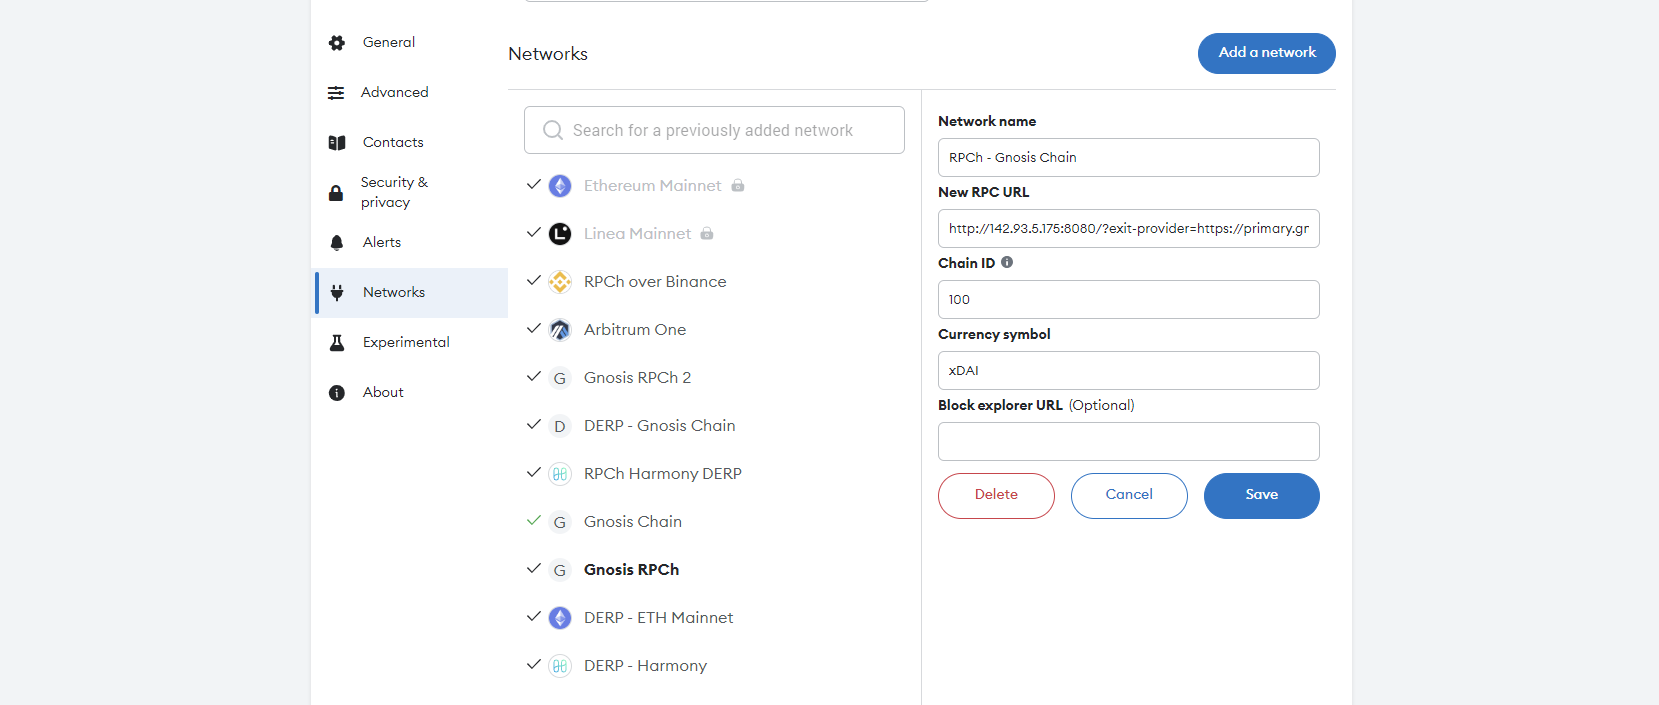
(3) Click Save and you are all done!
You can now use this network to visit any web3 service of your choice while maintaining your metadata and data privacy.
Adding the RPCh Network Manually (Any EVM Chain)
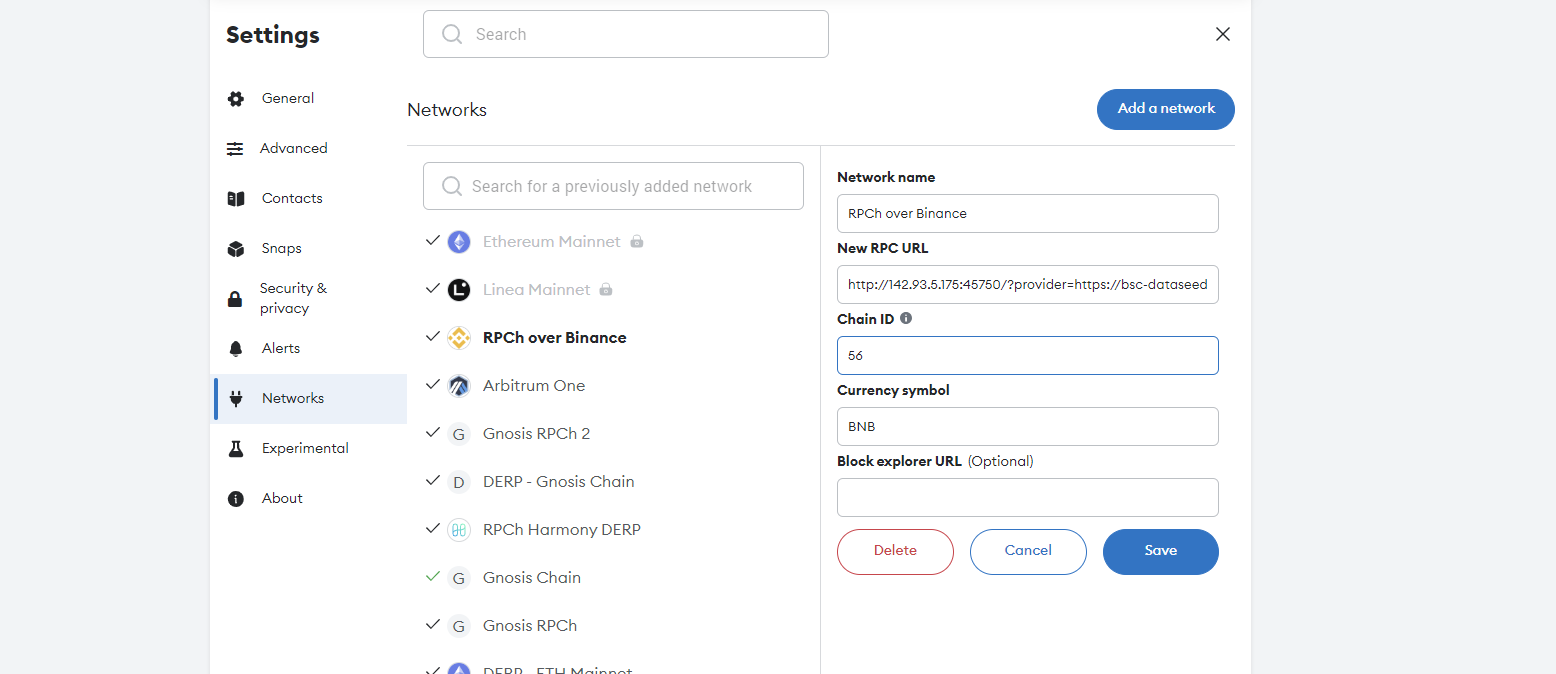
The above example was for the RPCh RPC endpoints, but you can use the same setup to manually add RPCh for any EVM chain by just adjusting the New RPC Url and Chain ID.
For example to use RPCh with the Binance Smart Chain, I would need its Chain ID: 56 and an RPC exit provider such as: https://bsc-dataseed4.binance.org. You can find providers and chain information for your desired chain using chainlist.
New RPC URL (Binance Smart Chain):
http://localhost:45750/?provider=https://bsc-dataseed4.binance.org
Example using new provider and chain ID (Binance Smart Chain):
Adding RPCh to Popular Wallets
Here are the basic outlines for adding RPCh to a few of the most common wallets:
- Metamask
- Trust wallet
- Frame
- Rabby
(1) Click on the network selector button in the top left corner. This will display a list of networks that you've already added.
(2) Click on the Add Network button.
(3) MetaMask will open in a new tab in fullscreen mode. From here, find and click on the Add network manually button at the bottom of the network list.
(4) Complete the fields with information from one of RPCh's endpoints or any RPC provider of you choice and then click Save to add the network.
(1) Click on the network selector button (top left corner). This will display a list of networks that you've added already.
(2) Click 'Manage networks'.
(3) Trust wallet will list current networks. From here, find and click on the 'Add custom network' button at the bottom.
(4) Complete the fields with information from one of RPCh's endpoints or any RPC provider of you choice and then click Save to add the network.
(1) Click on the menu icon (top left icon)
(2) Additional screen will popup, select 'Chains'.
(3) At the bottom find button 'Add New Chain'.
(4) Complete the fields with information from one of RPCh's endpoints or any RPC provider of you choice and then click Add chain to add the network.
(1) Click on the More icon.
(2) From the displayed menu select Custom RPC.
(3) At the botton click on the button Add RPC.
(4) Search for the chain you want to use.
(5) Enter the RPC url from one of RPCh's endpoints or any RPC provider of you choice and then click Save.