Using Any Wallet / EVM Chain
This tutorial gives an overview of how to run RPCh locally using a Docker connector. This setup allows you to add RPCh as a drop-in replacement to any wallet you use across any chain. Make sure to adjust the chain ID to match your provider, as the example below and the default provider use Gnosis.
Running RPCh With the Docker Connector
Install Docker
Make sure you have Docker installed on your device before trying to run RPCh with the Docker Connector.
- Linux
- macOS
- Windows
Depending on your distribution, please follow the official guidelines to install and run Docker on your workstation.
- Visit Docker and download Docker Desktop to your computer.
- Follow the wizard steps to ensure Docker is installed.
- Ensure the installation was successful by running
docker psin your terminal.
- Visit Docker and download Docker Desktop to your computer.
- Follow the wizard steps to ensure Docker is installed.
- Ensure the installation was successful by running
docker psin your terminal.
How to Run RPCh
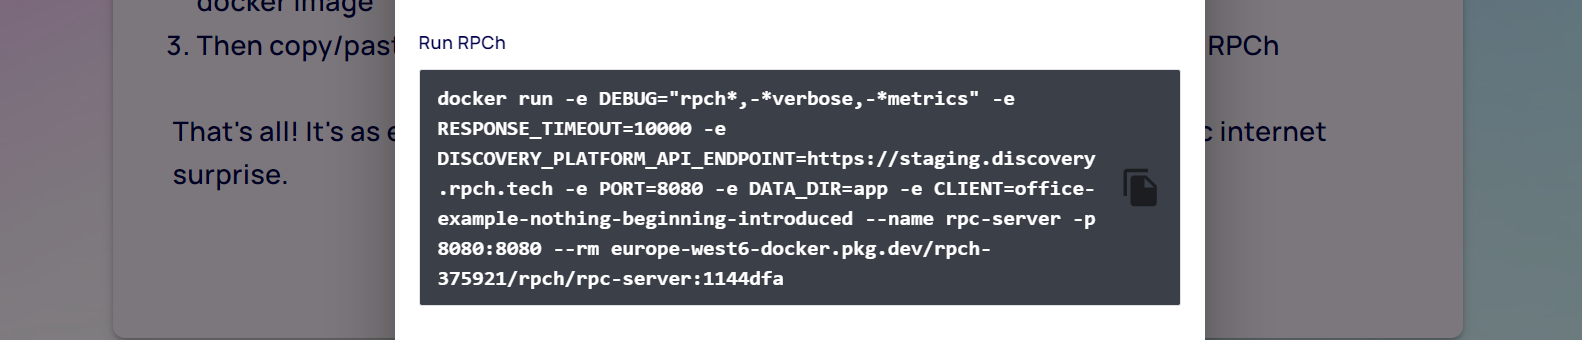
(1) Go to access.rpch.net and click the Download button under the Docker Connector installation tab. This will generate your unique secret access token and corresponding commands.
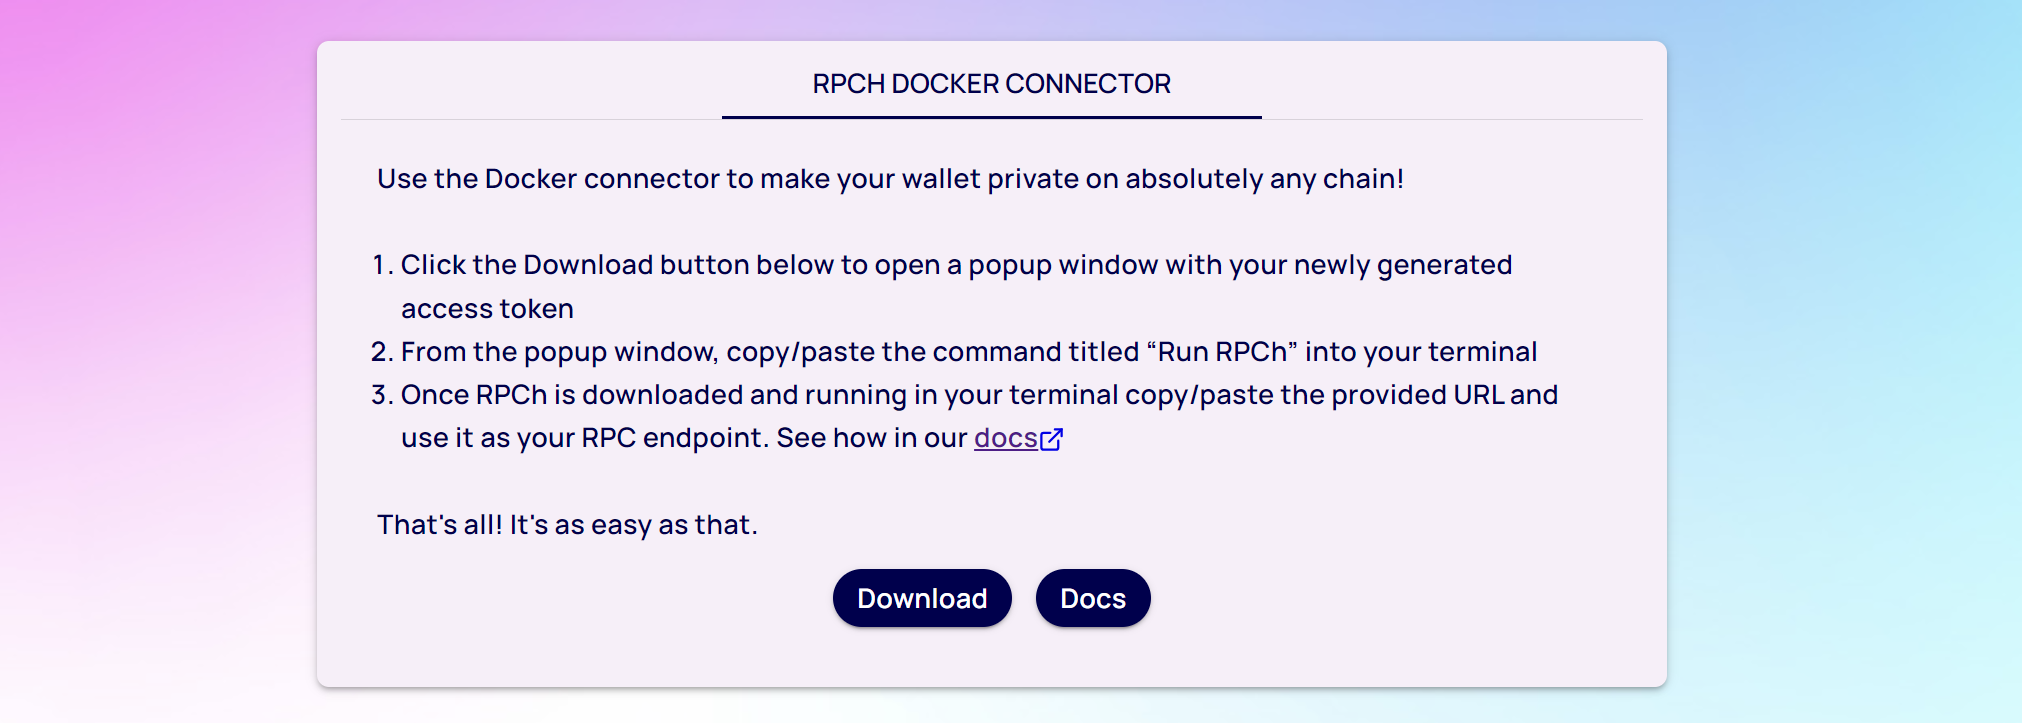
(2) Once the download completes, copy the Run RPCh command and paste it into your terminal.
(3) That's all! Now you have RPCh running, You can use it on any wallet by adding the local URL from the pop-up to your wallet as the RPC URL for a new network.

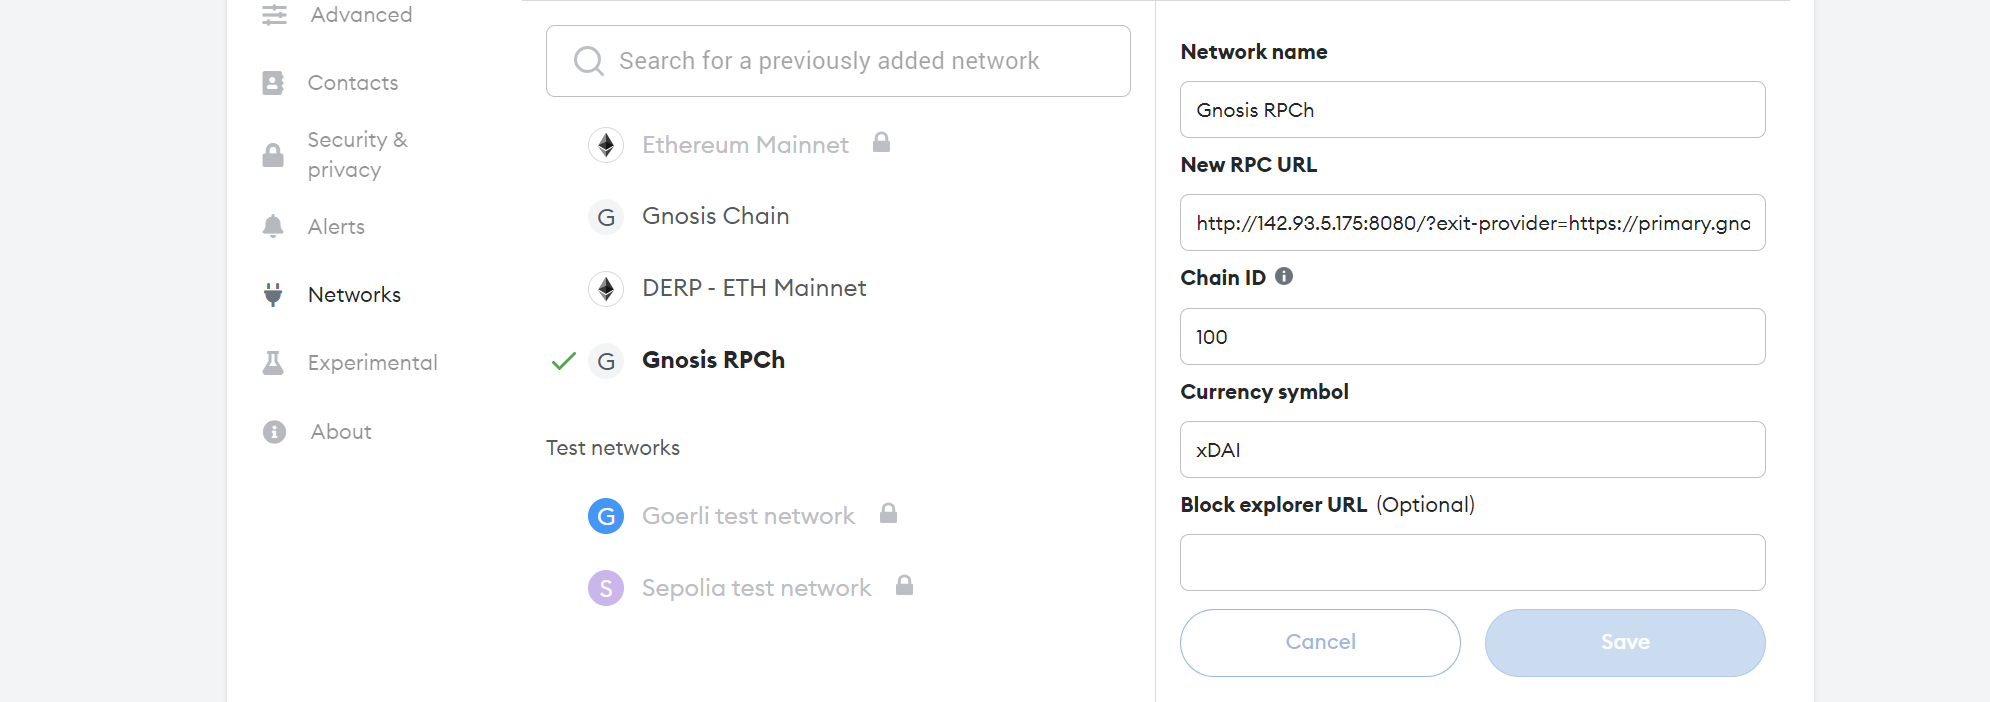
Note: If you are using a VPS to run RPCh, replace localhost with your VPS IP address, for example: http://142.93.5.175:8080/?exit-provider=https://primary.gnosis-chain.rpc.hoprtech.net would be my RPC URL if my VPS had the IP address: 142.93.5.175.
This original endpoint is the same for everyone, so you can copy it from here:
http://localhost:8080/?exit-provider=https://primary.gnosis-chain.rpc.hoprtech.net
Example Use: Default (Gnosis)
Here is an example of adding this to MetaMask for the Gnosis chain with chain ID: 100. This is the default chain for the provided URL: http://localhost:8080/?exit-provider=https://primary.gnosis-chain.rpc.hoprtech.net.
If you want to use RPCh with a different chain, e.g. Ethereum Mainnet, use the corresponding chain ID: 1 along with a new provider to instead of the default: https://primary.gnosis-chain.rpc.hoprtech.net.
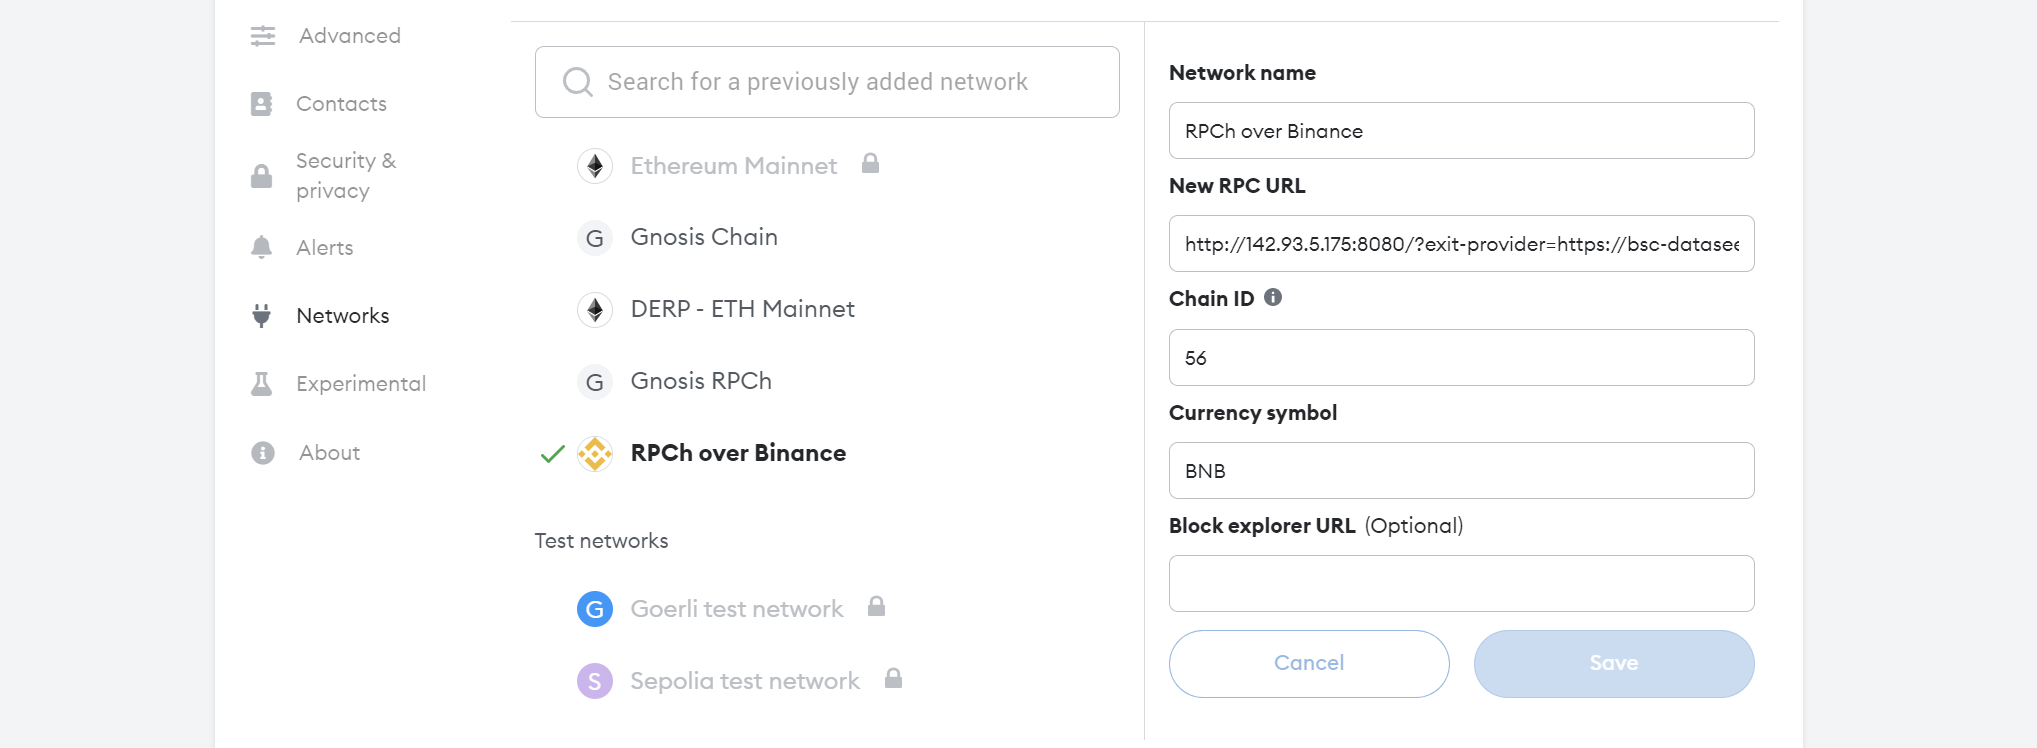
Example Use: Any EVM Chain
To use any other chain, change the exit provider and the chain ID, when adding a new wallet. For example to use RPCh with the Binance Smart Chain, I would need its Chain ID: 56 and an RPC exit provider such as: https://bsc-dataseed4.binance.org. You can find providers and chain information for your desired chain using chainlist.
New RPC URL (Binance Smart Chain):
http://localhost:8080/?exit-provider=https://bsc-dataseed4.binance.org
Example using new provider and chain ID (Binance Smart Chain):
Installation Demo
Here is a demo video of the installation process. For this:
- I'm using a VPS, so replace
localhostwith my VPS IP address for the exit URL. You won't need to do this if you are running RPCh locally on your terminal. - I donwload the server using the
Docker Pullcommand from the pop-up. This is an optional step that you can skip.
Note: With this setup, you can RPCh on any wallet and on any chain. Just choose the correct corresponding chain ID and use the same RPC URL.
Once RPCh stops running, this network will no longer work on your wallet. To avoid having to copy/paste the commands every time you want to use your wallet, you may want to use tmux with a VPS to run RPCh 24/7, so you can use your new custom network whenever you want.
Test that It Works
Inspect Browser Wallet
Once you have added the new network to your wallet, you can test that it is actually working by inspecting your browser wallet. The instructions below show how to do this for Chrome.
(1) Go to your browser's extensions page. For chrome you can type the following URL into your search bar: chrome://extensions/
(2) Locate your browser wallet and click on the hyperlinked service worker/background page/background.html text at the bottom of your extension.

(3) With the newly exposed console window open, connect to an exchange such as SushiSwap and see exactly what your wallet is doing, including its interactions with RPCh/HOPR nodes.

Terminal Logs
Check your terminal logs to make sure the server is still running fine.
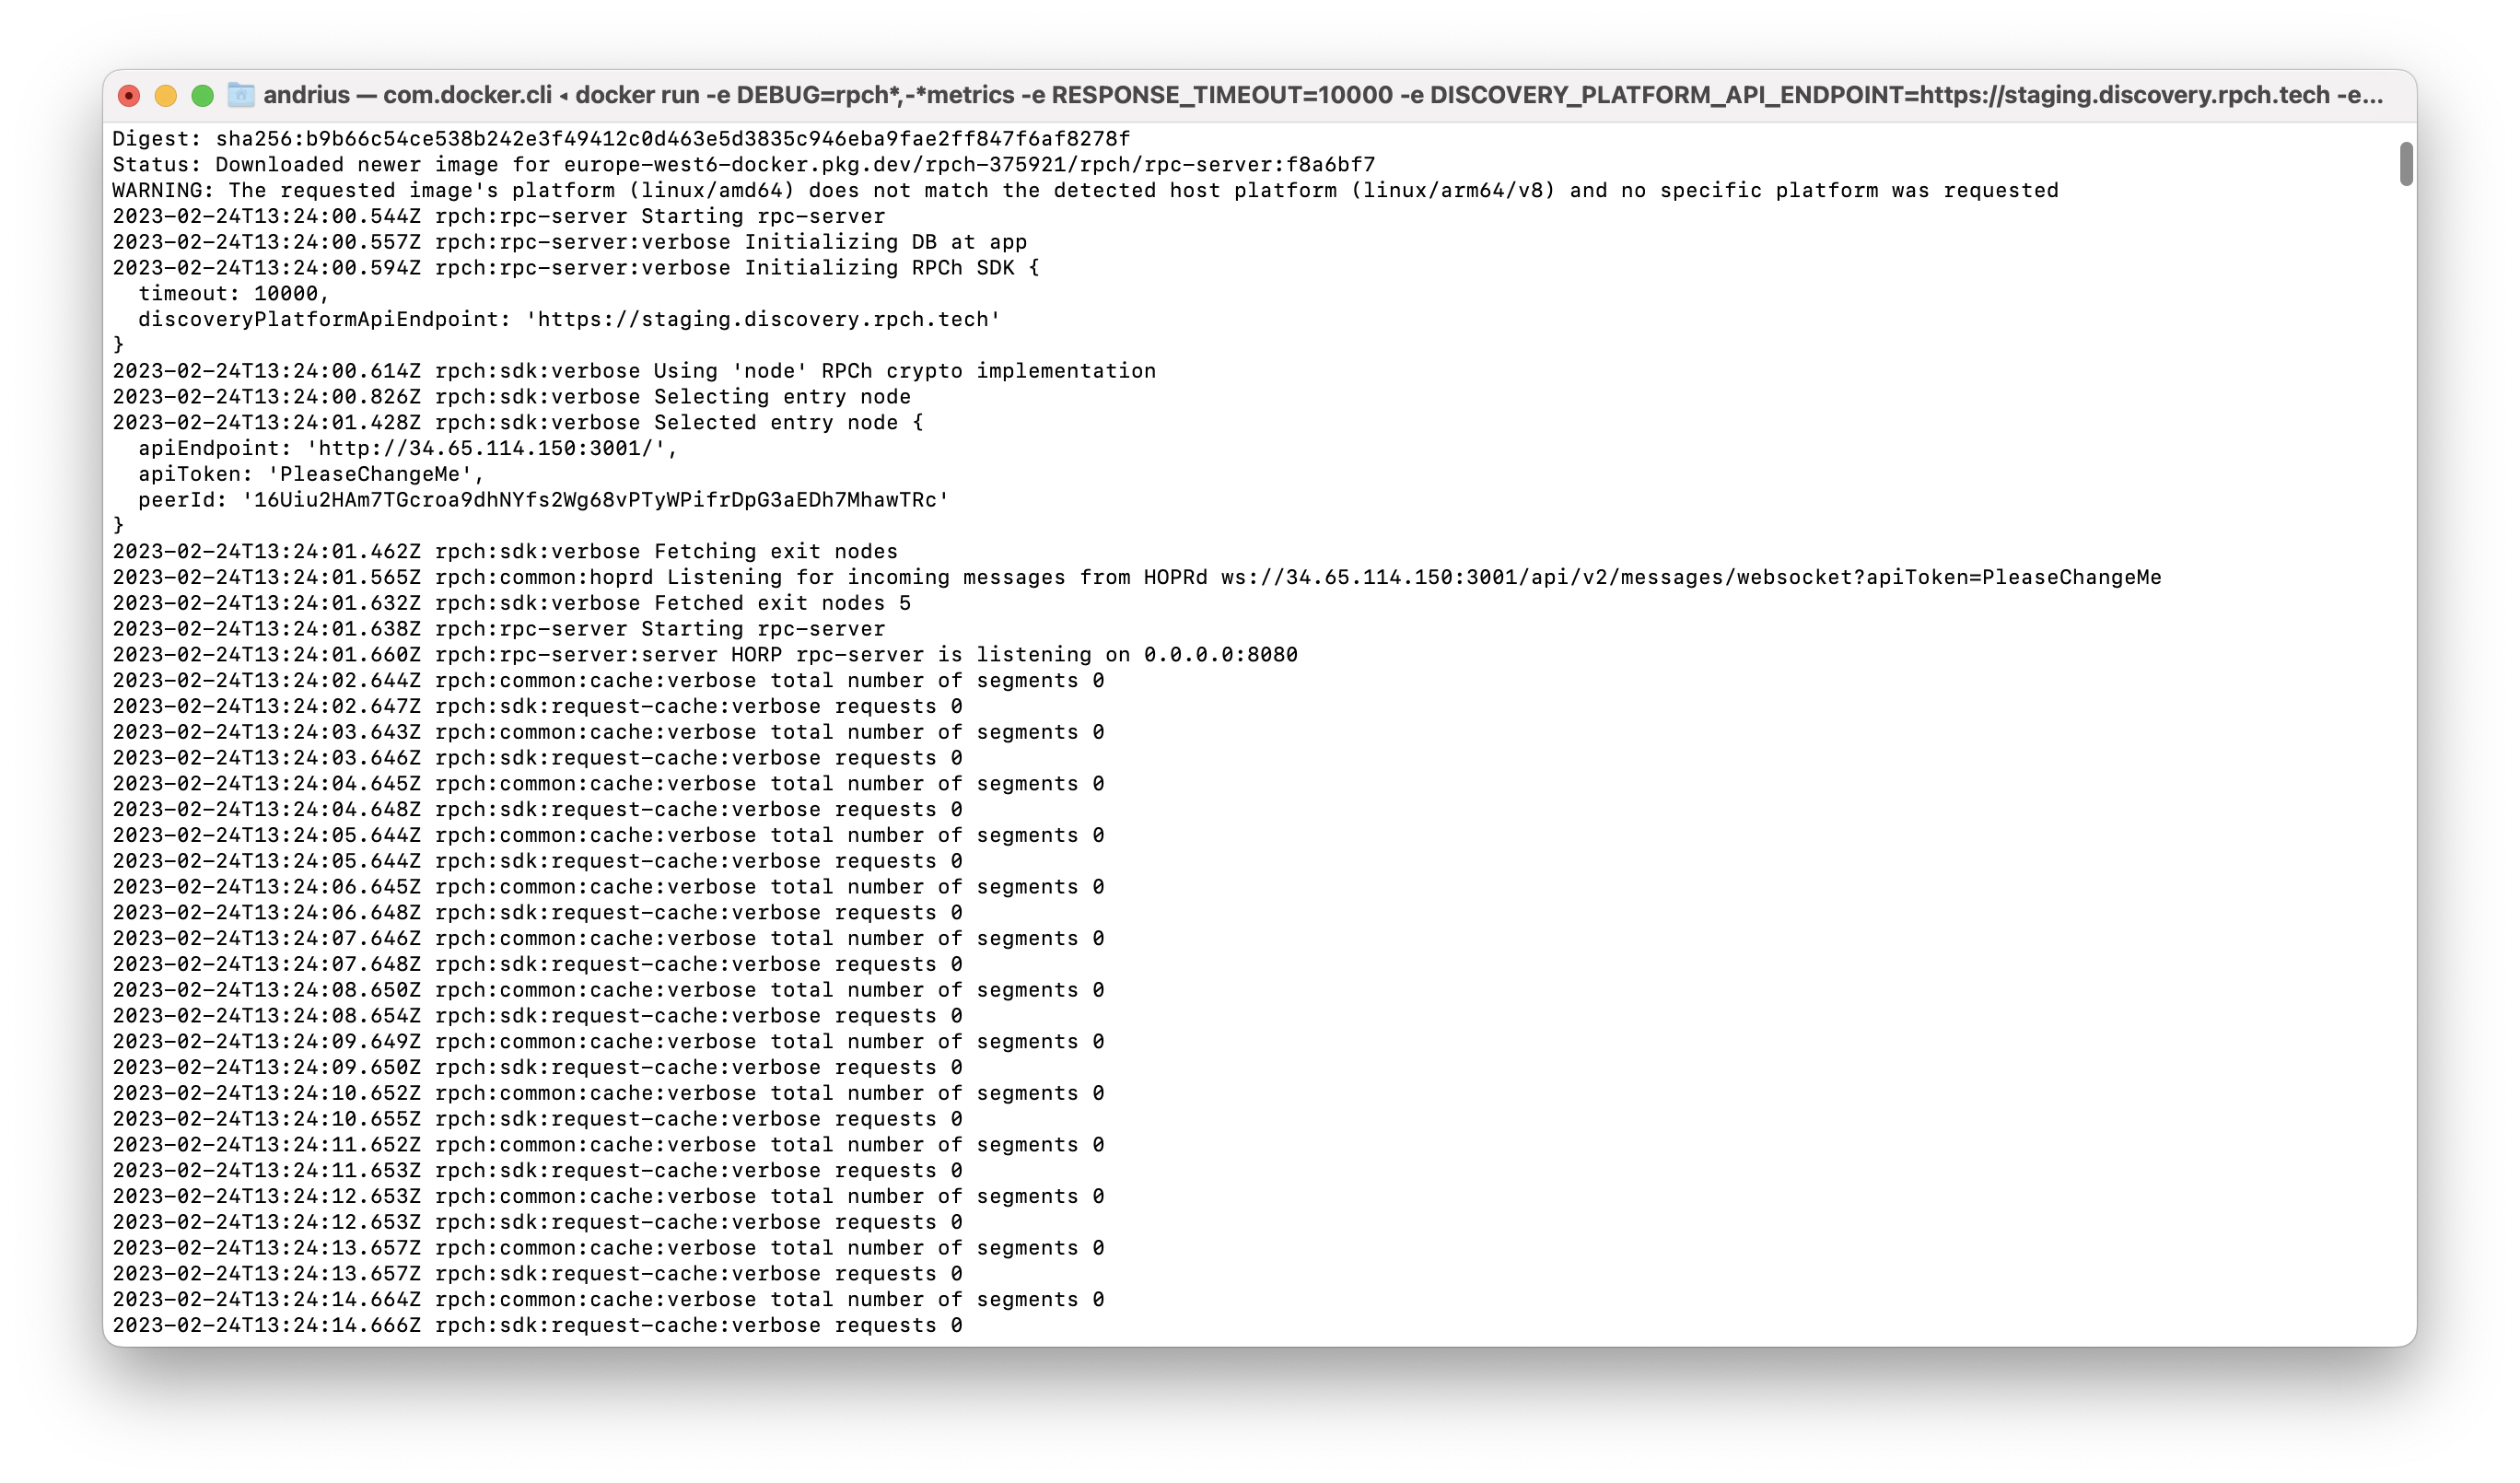
Configuring Logs
You can configure your logs to reduce spam by editing the docker command you are running. After the Debug tag you can list paths you do not want to see, e.g. add -rpch:somepath. By default, the original command provided to you does not show logs for RPCh metrics. Note: DEBUG="rpch*, -*metrics", this asks it to print all RPCh logs except the metrics.
docker run -e DEBUG="rpch*,-*metrics" -e RESPONSE_TIMEOUT=10000 -e DISCOVERY_PLATFORM_API_ENDPOINT=https://staging.discovery.rpch.tech -e PORT=8080 -e DATA_DIR=app -e CLIENT=shoulder-chapter-stems-broke-particular --name rpc-server -p 8080:8080 --rm europe-west6-docker.pkg.dev/rpch-375921/rpch/rpc-server:f8a6bf7
The syntax for editing it is as follows:
- list is comma seperated
- list specifies paths to logs which are emitted
- adding
-to a path omits it - adding
*to a path includes everything lower in the path